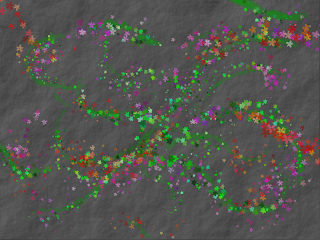
Hello and welcome back! The days of late August and the tail end of summer have been filled with heat and high temps. I've been staying cool and chugging lots of cool water, and other drinks. The topic for this week is graphics, and the program of the moment is Project Dogwaffle. I've written in past posts about this nifty free program but I've only really scratched the surface. This time out I'll talk more about creating a simple picture from scratch. For this example we'll make a green vine with flowers over a background that looks like stone. I started with a new blank page, at 800x600 resolution. From the “Filter” menu select “Render” and then “Plasma Noise”. Keep the default setting of 7 iterations and press “Go”. You'll get a nice pattern ranging from dark to light with slight variation. Now we'll copy the pattern to the swap buffer. You can think of the swap buffer in PD as a holding area that is the same size as the picture you're working on. From the “Buffer” menu select “Copy to Swap”, to copy the current picture to the swap buffer. Now select “Clear” from the buffer menu to clear the current screen to white. The white color is a bit too light, so we'll make it a more appropriate gray. In the tool panel, right click on the paint brush icon, and select “Simple”, and “Single”. Now we'll select a nice dark gray color from either the the black-to-white gradient or the tiled colors in the tool panel, by left clicking on it. The black rectangle in the tool panel will change color to whatever shade you selected. Now select the fill icon in the tool panel, and left click anywhere on white expanse of the current screen. If all went well you'll have a solid gray rectangle instead of the white one. At this point we're ready to apply a bit of texture, and make it look more like rock than a flat wall. From the “Filter” menu select “Emboss by Swap”. Press the “Top Left” button and press “OK” and a nice texture will be applied to the flat gray surface. The plasma noise pattern that we made back at the top has been used as a height map with the white or dark regions representing different depths. The result is a cool looking bumpy surface. Now we'll draw some vines and leaves and flowers over the background. Select a green color, by left clicking on the palette in the tool panel. Now we'll choose a paint tool by right clicking on the paint brush icon in the tool panel and select “Pastels”, and “Soft pastels”. Use the mouse to draw some gentle green curves. Now right click on the paint brush icon in the tool panel, and select “Organic effects”, and “Leafy 2”. This brush produces a variety of small leaves with each stroke. Add some leaves to the green curves to make them look like vines. We're almost done with the picture now. The last step will be to add some flowers. Select a contrasting color from the palette in the tool panel. In this case a red or orange or magenta will work well. Now right click on the paint brush icon, and select “Organic effects” and “Flowery”. The flower brush works in a similar manner to the leafy brush. Draw some flowers on and around the green vines using the mouse and holding down the left button. There we go. A finished picture in less time than it takes to make hummus. You can save your completed painting in TGA or BMP format by selecting “Save” from the “File” menu. We'll try out some other features of PD in a future post.
Here's my finished PD painting:
Click on a picture to get the full-sized view.

The loops of the week are still on hold while I search for another place to store them.
The website of the week is a Czech Radio page featuring MP3 and FLAC recordings of Bach's Brandenburg Concertos performed on period instruments. Go there and get your Baroque fix.
Send your comments and feedback and I’ll read it all and respond to some of it. Bye for now!
